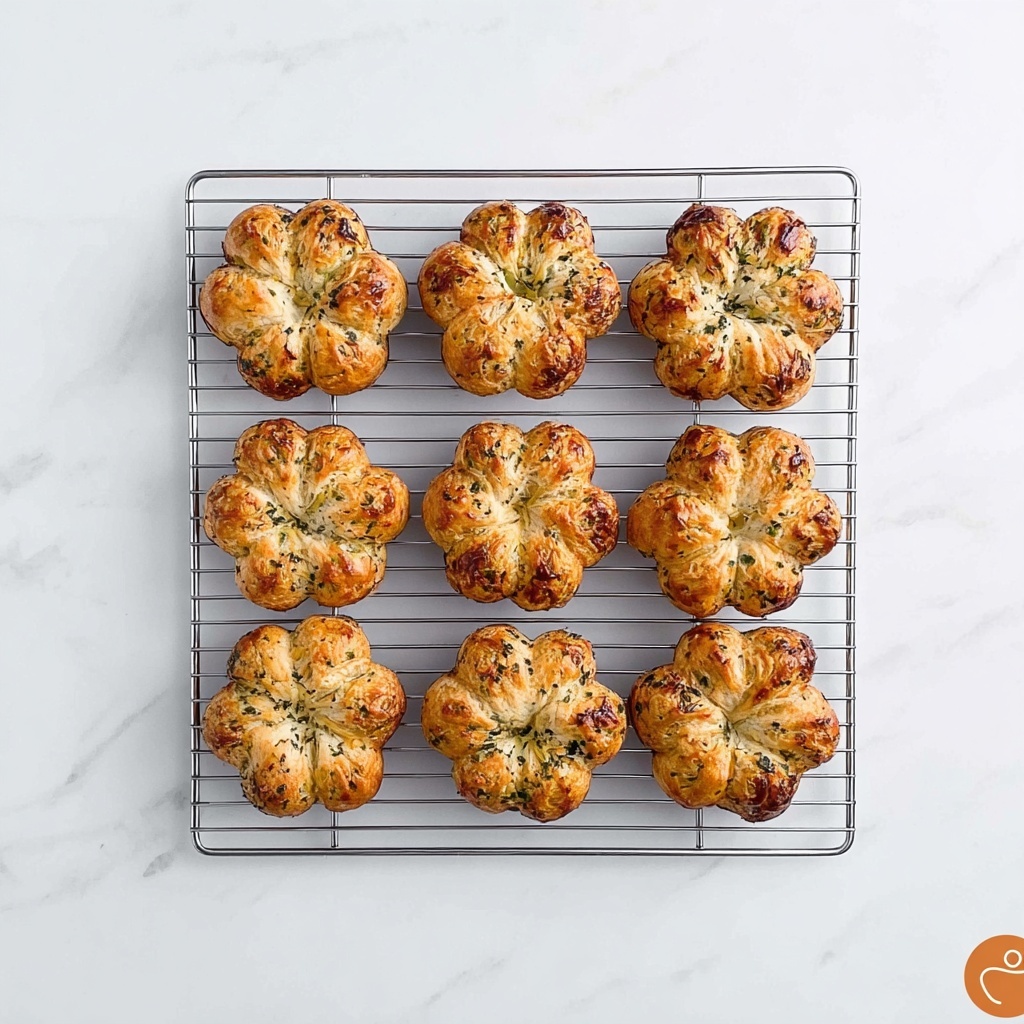
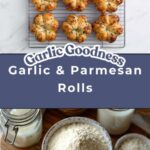
If you’re searching for a warm, comforting treat that fills the kitchen with the most irresistible aroma, look no further than this Garlic & Parmesan Rolls Recipe. The combination of soft, fluffy dough layered with buttery garlic and sharp Parmesan cheese creates a perfect harmony that simply melts in your mouth. Whether it’s for a weeknight dinner or a special gathering, these rolls bring an inviting homemade touch that everyone will appreciate. Let me take you through this classic recipe that’s as approachable as it is delicious.
Ingredients You’ll Need
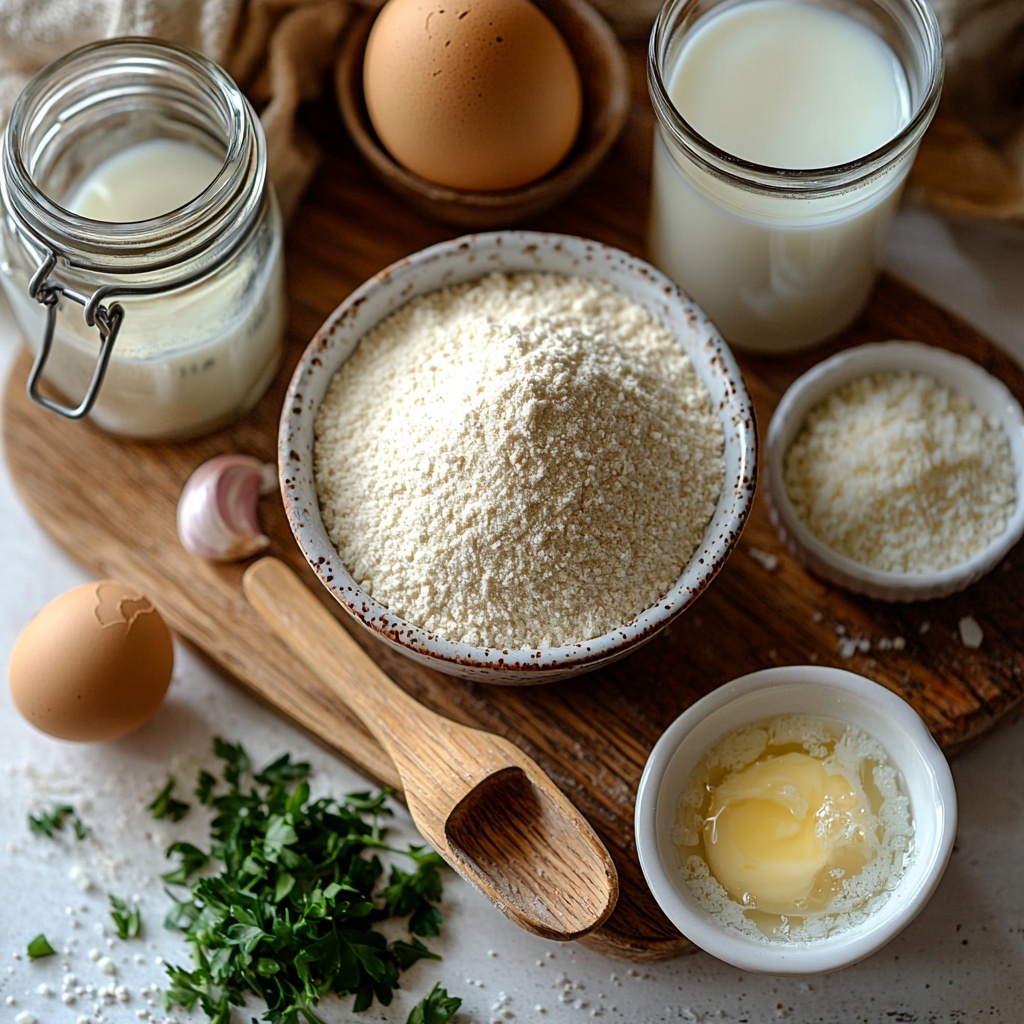
These ingredients are straightforward but essential for crafting the perfect rolls. Each element plays a key role in delivering the soft texture, rich flavor, and golden color that make these bread rolls so memorable.
- All-purpose flour (3 cups / 360 g): The backbone of the dough, providing structure and a tender crumb.
- Active dry yeast (2 1/4 teaspoons / 1 packet): This is what helps your dough rise and get those lovely airy pockets.
- Granulated sugar (1/4 cup / 50 g): Adds just the right touch of sweetness while feeding the yeast for a perfect rise.
- Salt (1 teaspoon): Balances the flavors and enhances the overall taste.
- Warm milk (1/2 cup / 120 ml): Brings a tender softness and adds richness to the dough.
- Warm water (1/4 cup / 60 ml): Activates the yeast and contributes to a light texture.
- Unsalted butter, melted (1/4 cup / 60 g): Enriches the dough, providing a creamy and decadent bite.
- Large egg (1): Adds moisture and structure, helping bind the dough together.
- Unsalted butter, melted (3 tablespoons) for brushing: Infuses the rolls with buttery garlic flavor and aids browning.
- Garlic, minced (2 cloves): The star ingredient—brings that bold, aromatic punch we love.
- Grated Parmesan cheese (1/4 cup): Adds a sharp, nutty layer that perfectly complements the garlic.
- Chopped fresh parsley (1 tablespoon, optional): For a fresh, herby finishing touch to brighten the rolls.
How to Make Garlic & Parmesan Rolls Recipe
Step 1: Activate the Yeast
Start by combining your warm milk, warm water, sugar, and yeast in a small bowl. This mixture needs to sit quietly for 5 to 10 minutes until it looks foamy. That foaming action means the yeast is alive and ready to work its magic in your dough. If it doesn’t foam, your yeast might be old or the liquids too hot or cold, so always check temperature and freshness!
Step 2: Prepare the Dough
In a large bowl, whisk together the flour and salt. Add the foamy yeast mixture, melted butter, and egg into the dry ingredients. Then get your hands or stand mixer ready to knead. This step takes about 8 to 10 minutes by hand — patience is rewarded here with soft, elastic dough. You want it smooth and a little stretchy, not sticky. Kneading helps develop gluten, giving you that perfect roll texture.
Step 3: First Rise
Cover the dough with a clean towel and place it somewhere warm, undisturbed, for 1 to 1 1/2 hours. During this time, it should double in size. This first rise is what creates those fluffy air pockets inside the rolls that everyone adores.
Step 4: Shape the Rolls
Once risen, punch down the dough gently to release excess air. Divide the dough into 12 equal pieces and roll each piece into a smooth ball. Placing them close together in a greased 9×13-inch baking dish encourages a lovely pull-apart effect after baking. Cover them again and let rise for around 30 minutes. This second rise is crucial for height and tenderness.
Step 5: Add Garlic Butter and Cheese
Preheat your oven to 375°F (190°C). In a small bowl, mix melted butter with minced garlic, then brush this fragrant mixture evenly over each roll. Sprinkle generously with grated Parmesan cheese for a savory finish that crisps up beautifully in the oven.
Step 6: Bake to Golden Perfection
Bake the rolls for 20 to 25 minutes until they turn a gorgeous golden brown and smell absolutely heavenly. Right after pulling them from the oven, brush them with any remaining garlic butter and sprinkle chopped parsley if you like. This last touch adds that fresh pop of color and brightness.
How to Serve Garlic & Parmesan Rolls Recipe
Garnishes
A light sprinkling of freshly chopped parsley adds vibrant color and an herbal lift that contrasts wonderfully with the rich cheese and garlic. For extra indulgence, drizzle a little extra garlic butter right before serving to keep them luscious and moist.
Side Dishes
These rolls are clutch companions to hearty soups, creamy pastas, or a fresh green salad. Their buttery garlic flavor can stand up to bold stews just as nicely as they enhance simple grilled chicken or steak dinners. Consider pairing them with tomato soup for a cozy mealtime hug.
Creative Ways to Present
For a stunning table centerpiece, arrange the rolls in a circular shape on a large platter, garnished with fresh herbs like rosemary or thyme. You can also slice them open and fill with garlic butter blends or soft cheese for a fancy appetizer twist. The pull-apart characteristic invites sharing and makes every meal feel like a celebration.
Make Ahead and Storage
Storing Leftovers
If you happen to have some leftovers, simply place them in an airtight container or resealable plastic bag at room temperature for up to 2 days. To keep them fresh, warming them slightly before serving makes all the difference.
Freezing
This Garlic & Parmesan Rolls Recipe freezes beautifully. You can freeze the shaped rolls before baking by wrapping the pan tightly with plastic wrap and aluminum foil, then freeze for up to 2 months. When you’re ready, thaw overnight in the refrigerator, let rise again, then bake as usual.
Reheating
Reheat rolls in a preheated oven at 350°F (175°C) for about 10 minutes to restore their fresh-baked aroma and softness. Alternatively, microwave them briefly covered with a damp paper towel for a quick fix, but oven reheating yields the best texture.
FAQs
Can I use instant yeast instead of active dry yeast?
Yes, you can substitute instant yeast, but it doesn’t require proofing in warm water. Add it directly to the flour mixture and adjust liquid amounts slightly as needed. The rising times might be a bit quicker.
What if I don’t have Parmesan cheese? Is there a substitute?
While Parmesan adds a unique sharpness, you can use other hard cheeses like Asiago or Pecorino Romano. For a milder flavor, a sprinkle of shredded cheddar works too—just expect a different taste profile.
Can I make these rolls vegan?
You can adapt the recipe by swapping butter with plant-based margarine and using a flax egg (ground flaxseed mixed with water) instead of the chicken egg. The texture may vary slightly but will still be tasty.
How do I know when the rolls are fully baked?
Look for a golden brown top and bottoms that feel firm when tapped. An internal temperature of around 190°F (88°C) indicates they are baked through. The aroma is usually a great hint that they’re ready to come out of the oven.
What’s the best way to get soft rolls?
The key to soft rolls is kneading well to develop gluten and making sure both rise times are completed fully. Using warm, not hot, liquids and covering the dough to prevent drying out helps maintain a tender crumb.
Final Thoughts
There’s something truly special about pulling warm Garlic & Parmesan Rolls from the oven—each bite a perfect blend of buttery garlic richness and cheesy goodness wrapped in soft, fluffy bread. This recipe is both a go-to comfort food and an impressive addition to any meal, perfect for sharing with family and friends. I hope you enjoy making and savoring these rolls as much as I do. Give it a try and transform your table into a cozy, delicious haven!
Print
Garlic & Parmesan Rolls Recipe
- Prep Time: 20 minutes
- Cook Time: 25 minutes
- Total Time: 1 hour 15 minutes
- Yield: 12 rolls
- Category: Bread
- Method: Baking
- Cuisine: American
- Diet: Vegetarian
Description
These Garlic & Parmesan Rolls are soft, fluffy, and bursting with buttery garlic flavors topped with savory Parmesan cheese. Perfect as a side for dinner or served warm for a comforting snack, these homemade rolls feature a tender crumb and a golden crust, enhanced by fresh parsley for a pop of color and freshness.
Ingredients
Dough Ingredients
- 3 cups (360 g) all-purpose flour
- 2 1/4 teaspoons (1 packet) active dry yeast
- 1/4 cup (50 g) granulated sugar
- 1 teaspoon salt
- 1/2 cup (120 ml) warm milk
- 1/4 cup (60 ml) warm water
- 1/4 cup (60 g) unsalted butter, melted
- 1 large egg
Topping Ingredients
- 3 tablespoons unsalted butter, melted (for brushing)
- 2 cloves garlic, minced
- 1/4 cup grated Parmesan cheese
- 1 tablespoon chopped fresh parsley (optional)
Instructions
- Activate Yeast: In a small bowl, combine warm milk, warm water, granulated sugar, and active dry yeast. Let the mixture sit for 5 to 10 minutes until it becomes foamy, indicating the yeast is active.
- Prepare Dough: In a large mixing bowl, mix together the all-purpose flour and salt. Add the yeast mixture, egg, and melted butter to the flour. Knead the ingredients either by hand for about 8 to 10 minutes or using a stand mixer for approximately 5 minutes until a smooth and elastic dough forms.
- First Rise: Cover the dough with a clean towel and let it rise in a warm, draft-free area for 1 to 1 1/2 hours or until it has doubled in size.
- Shape Rolls: Punch down the risen dough to release air bubbles. Divide the dough into 12 equal pieces and roll each piece into a smooth ball. Place the dough balls close together in a greased 9×13-inch baking dish.
- Second Rise: Cover the baking dish and allow the rolls to rise for another 30 minutes until puffy.
- Preheat Oven and Prepare Topping: Preheat your oven to 375°F (190°C). In a small bowl, mix melted butter with minced garlic. Brush this garlic butter evenly over the tops of the rolls and sprinkle with grated Parmesan cheese.
- Bake Rolls: Bake the rolls in the preheated oven for 20 to 25 minutes until they turn golden brown on top.
- Final Touch: Remove the rolls from the oven. Brush them with any remaining garlic butter and sprinkle with chopped fresh parsley if desired. Serve warm for the best flavor and texture.
Notes
- For additional flavor, add a pinch of Italian seasoning to the garlic butter before brushing.
- These rolls can be frozen after shaping and before the second rise; thaw completely and bake as directed.


