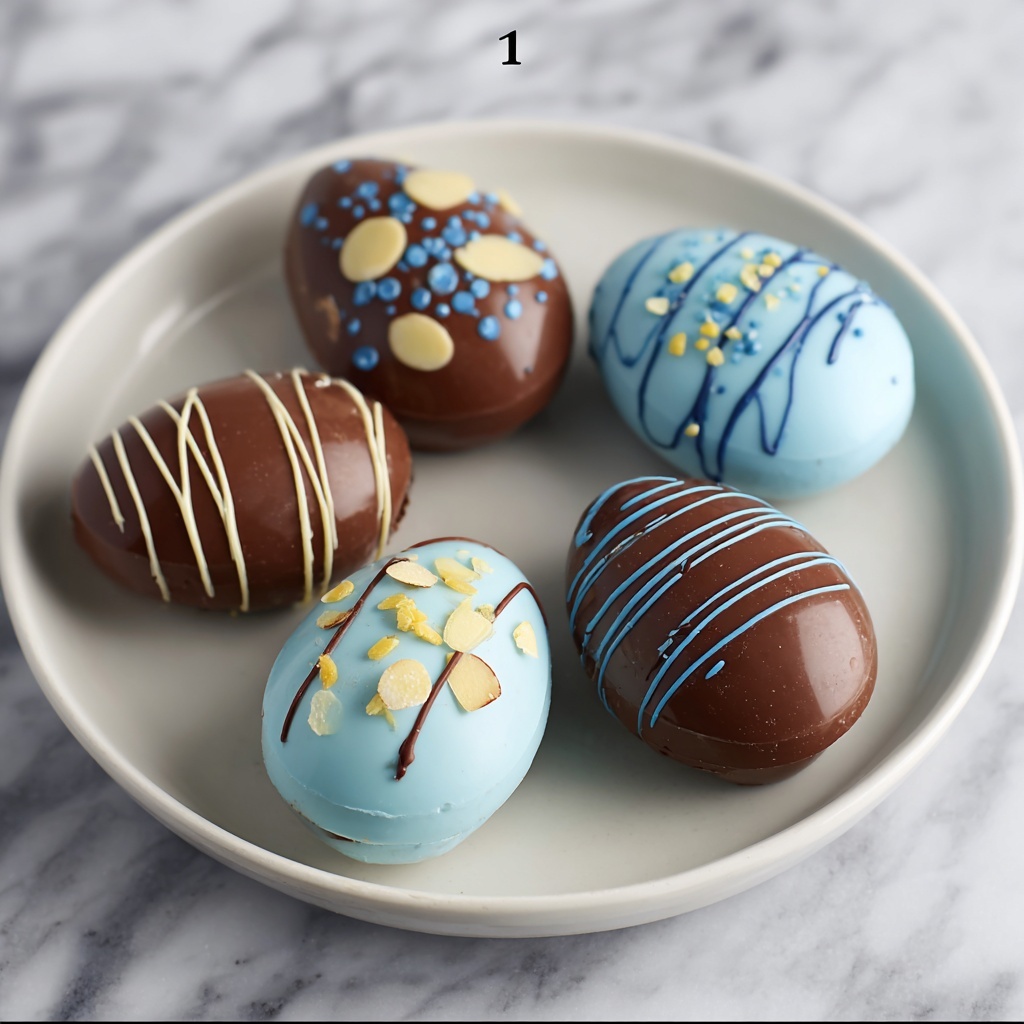
If you have ever dreamed of creating your own delightful Easter treats that feel personal and taste absolutely divine, the Easy Homemade Chocolate Easter Eggs (Simple & No-Bake) Recipe is your new best friend. This recipe combines rich, smooth chocolate with optional luscious fillings, all crafted without turning on the oven. Whether you want to indulge in classic chocolate eggs or surprise your loved ones with a creamy peanut butter center, these easy-to-make goodies promise a joyful and delicious journey from start to finish.
Ingredients You’ll Need
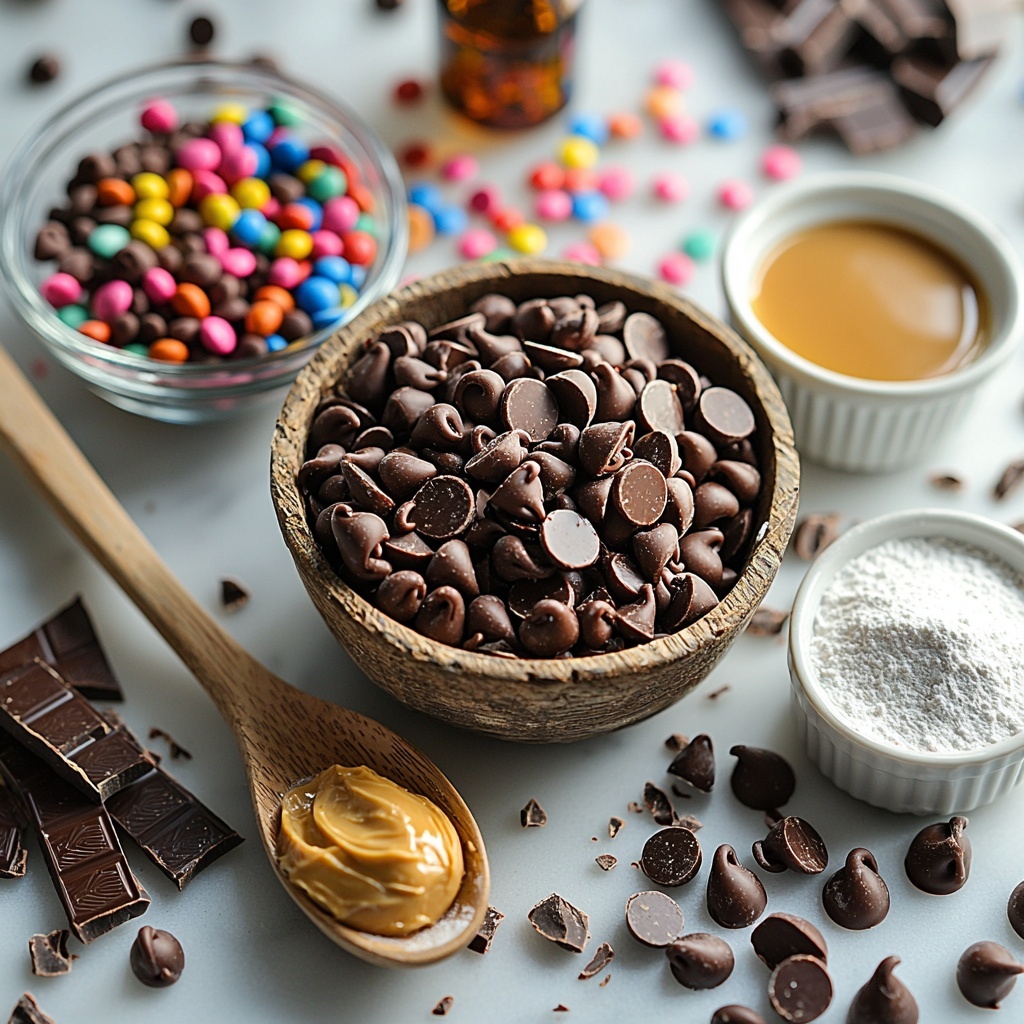
Getting ready for these charming chocolate eggs means gathering a handful of straightforward and essential ingredients. Each one plays a crucial role, ensuring your chocolate eggs have that perfect balance of flavor, texture, and visual appeal.
- 2 cups high-quality milk chocolate or semi-sweet chocolate chips: Provides the rich, velvety base flavour and is easy to melt for smooth shells.
- 1 tablespoon coconut oil or vegetable shortening: Helps create a glossy finish and softer texture in the chocolate coating.
- 1/2 cup creamy peanut butter or chocolate hazelnut spread (optional filling): Adds a luscious, creamy center for extra indulgence.
- 1/4 cup powdered sugar (if making peanut butter filling): Sweetens and helps firm up the filling for easier handling.
- 1/2 teaspoon vanilla extract (optional): Enhances the flavor with a subtle aromatic note that complements both chocolate and peanut butter.
- 2 tablespoons colorful sprinkles or crushed candies for decoration (optional): Adds a festive, playful touch and tempting texture variations.
How to Make Easy Homemade Chocolate Easter Eggs (Simple & No-Bake) Recipe
Step 1: Melt the Chocolate
The magic begins with melting your chocolate chips and coconut oil. Use a heatproof bowl set over a pot of simmering water or microwave in 20-second bursts, stirring in between until everything is smooth and glossy. The coconut oil ensures the chocolate coats perfectly and has a beautiful shine when set.
Step 2: Prepare the Optional Peanut Butter Filling
If you’re going for that extra special creamy filling, mix peanut butter, powdered sugar, and vanilla extract until the combination is smooth and just firm. This step is optional but highly recommended for a rich surprise once you bite into your Easter egg.
Step 3: Create the Chocolate Shells
Spoon a small amount of melted chocolate into clean silicone egg molds. Use the back of a spoon or a small brush to gently coat the sides evenly. These chocolate shells are the canvas for your beautiful Easter eggs, so take your time to make sure the coating is smooth and consistent. Chill them in the refrigerator for about 10 to 15 minutes until the chocolate firms up.
Step 4: Add the Filling and Seal
For eggs with filling, add a small dollop of your peanut butter mixture into the center of each set shell. Leave a little gap around the edges so you can seal them with more chocolate. Then cover the filling carefully with melted chocolate and smooth the top. Tap the molds gently on the countertop to release any air bubbles and sprinkle decorations on top, if you desire. Pop them back in the fridge to set completely for 20 to 30 minutes.
Step 5: Remove and Store
Once solid and fully set, carefully pop the eggs out of their molds. They should come free easily thanks to the silicone. Store your beautiful creations in an airtight container in the refrigerator to keep them fresh until it’s time to enjoy. These treats are perfect for gifting or simply treating yourself!
How to Serve Easy Homemade Chocolate Easter Eggs (Simple & No-Bake) Recipe
Garnishes
Elevate your chocolate Easter eggs with bright, playful garnishes like colorful sprinkles, crushed nuts, or edible glitter. Sprinkles add festive color, while chopped nuts add a delightful crunch that contrasts beautifully with the smooth chocolate.
Side Dishes
Pair these decadent eggs with fresh berries or a scoop of whipped cream for a light and refreshing touch. For adults, a small glass of dessert wine or a warm cup of coffee creates an indulgent, balanced experience that rounds out the sweetness.
Creative Ways to Present
Why not turn these Easy Homemade Chocolate Easter Eggs (Simple & No-Bake) Recipe delights into a centerpiece? Arrange them artistically in a decorative basket lined with pastel-colored shredded paper or nestle them individually in clear cellophane bags tied with ribbons. They’re perfect gifts and charming party favors that will impress everyone.
Make Ahead and Storage
Storing Leftovers
Keep any leftover chocolate eggs in an airtight container inside the refrigerator to maintain freshness and prevent melting. Proper storage ensures they retain their perfect texture and flavor for up to one week.
Freezing
If you want to prepare these treats in advance, chocolate Easter eggs freeze wonderfully. Place them in an airtight container or freezer bag, with parchment paper in between layers to avoid sticking, and freeze for up to one month. Thaw in the refrigerator before serving to keep the delicate texture intact.
Reheating
Since these eggs are best enjoyed chilled, avoid heating them directly. Instead, simply take them out of the fridge a few minutes before eating to bring out their full flavor and silky smooth texture without compromising their shape.
FAQs
Can I make these eggs dairy-free?
Absolutely! Use dairy-free or vegan chocolate chips and substitute coconut oil for any dairy-based fats. This recipe adapts beautifully to a dairy-free lifestyle without sacrificing taste or texture.
Do I have to use the peanut butter filling?
Nope, skipping the filling still results in delicious chocolate eggs. The filling adds an indulgent layer, but plain chocolate eggs are equally wonderful and simpler to assemble.
What if I don’t have silicone molds?
Silicone molds are ideal for easy removal, but if unavailable, plastic molds designed for chocolate work as well. Avoid metal molds as they can cause uneven cooling and may be harder to release the eggs from.
Can I customize the filling?
Definitely! Feel free to experiment with fillings like caramel, marshmallow cream, or cookie butter to give your eggs a unique twist that reflects your personal taste.
How long do these chocolate eggs keep?
Stored properly in the refrigerator, your homemade chocolate eggs will stay fresh for about one week. Beyond that, they might begin to lose their perfect texture and taste.
Final Thoughts
This Easy Homemade Chocolate Easter Eggs (Simple & No-Bake) Recipe offers not only a delicious treat but also a fun and rewarding experience. From melting chocolate to creating smooth shells and adding delightful fillings, it’s a joy that anyone can share. So gather your ingredients, have some fun, and enjoy the smiles your homemade Easter eggs will bring to the table. Trust me, once you taste these, store-bought candy will be a thing of the past!
Print
Easy Homemade Chocolate Easter Eggs (Simple & No-Bake) Recipe
- Prep Time: 20 minutes
- Cook Time: 5 minutes
- Total Time: 25 minutes
- Yield: 12 chocolate eggs
- Category: Dessert
- Method: No-Cook
- Cuisine: American
- Diet: Vegetarian
Description
Learn how to make Easy Homemade Chocolate Easter Eggs with this simple, no-bake recipe. Perfect for holiday treats, these chocolate eggs can be filled with a creamy peanut butter or chocolate hazelnut spread and decorated with colorful sprinkles for a festive touch.
Ingredients
Chocolate Shell
- 2 cups high-quality milk chocolate or semi-sweet chocolate chips
- 1 tablespoon coconut oil or vegetable shortening
Optional Filling
- 1/2 cup creamy peanut butter or chocolate hazelnut spread
- 1/4 cup powdered sugar (if making peanut butter filling)
- 1/2 teaspoon vanilla extract (optional)
Decoration
- 2 tablespoons colorful sprinkles or crushed candies (optional)
Instructions
- Melt the chocolate: Combine the chocolate chips and coconut oil in a heatproof bowl. Melt gently over a pot of simmering water or in the microwave in 20-second intervals, stirring between each until smooth and glossy.
- Prepare the filling (optional): In a small bowl, mix the peanut butter, powdered sugar, and vanilla extract until the mixture is smooth and slightly firm, perfect for spooning into the molds.
- Create chocolate shells: Spoon a small amount of melted chocolate into silicone egg molds. Use the back of a spoon to evenly coat the sides to form the shell.
- Set the shells: Refrigerate the coated molds for 10 to 15 minutes until the chocolate hardens and sets.
- Add filling (if using): Spoon a small amount of the prepared filling into the center of each chocolate shell, leaving space around the edges.
- Seal the eggs: Pour more melted chocolate on top to cover the filling completely and smooth the tops. Tap the molds gently to release any air bubbles.
- Decorate and chill: Sprinkle decorations like colorful sprinkles or crushed candies on top if desired. Return the molds to the refrigerator for 20 to 30 minutes or until completely firm.
- Remove and store: Carefully pop the chocolate Easter eggs out of the silicone molds. Store them in an airtight container in the refrigerator until ready to serve.
Notes
- Use dairy-free chocolate to make this recipe vegan-friendly.
- Silicone molds work best for easy removal of the eggs.
- Store the finished eggs in a cool place to prevent melting.
- Customize the filling with caramel, marshmallow cream, or cookie butter for variety.


