
If you’ve ever wanted to create a fun, versatile snack that’s bursting with flavor and totally customizable, then you’re going to love this Delicious Onigiri: Japanese Rice Balls You Can Customize Recipe. These little rice gems are not just a feast for your taste buds but also a joy to make, bringing a perfect balance of soft, savory rice with a delightful hint of nori and furikake seasoning. Whether you want a quick lunch, a picnic treat, or a creative appetizer, this recipe lets you put a personal spin on traditional Japanese onigiri, making it as simple or as adventurous as you like.
Ingredients You’ll Need
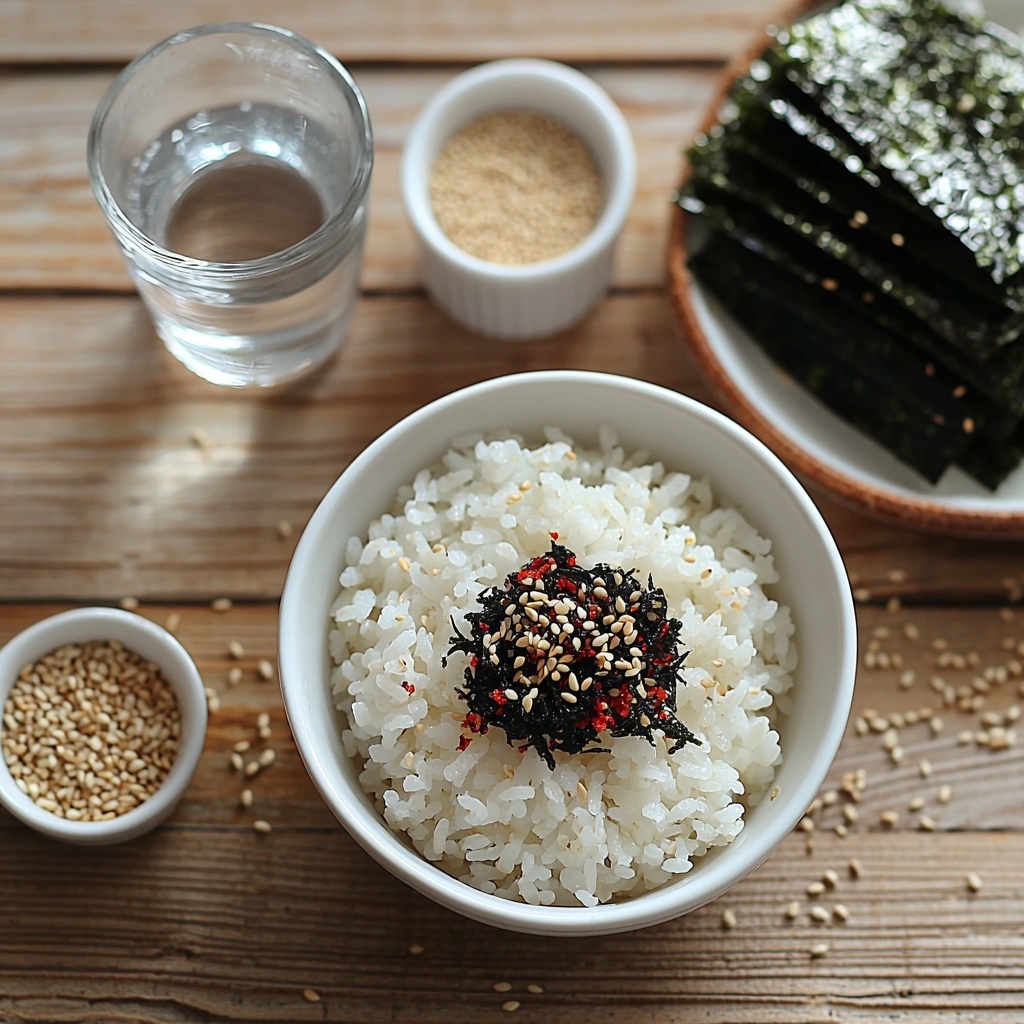
The magic of this recipe lies in its simple yet essential ingredients, each chosen to deliver authentic texture, flavor, and that perfect visual pop. With just a few pantry staples, you can whip up onigiri that feel thoughtfully crafted but are incredibly easy to make. From the fluffiness of medium-grain rice to the umami kick of furikake, every element plays a starring role.
- 2 cups Cooked Rice: Use freshly cooked medium-grain rice for the ideal sticky texture that helps the balls hold their shape.
- 2 tablespoons Furikake: This seasoning blend adds a savory umami boost and a touch of color to the rice.
- 1 cup Water: This is to wet your hands and keep the rice from sticking while shaping your onigiri perfectly.
- 1 teaspoon Kosher Salt: A pinch on your hands enhances the flavor of the rice as you form each ball.
- 4 sheets Roasted Nori: Cut into strips for wrapping around the bases, adding seaweed’s classic salty crunch.
- 2 tablespoons Sesame Seeds (Optional): For a subtle nutty finish and a little extra texture.
How to Make Delicious Onigiri: Japanese Rice Balls You Can Customize Recipe
Step 1: Season the Rice
Start by mixing your freshly cooked rice with the vibrant furikake seasoning in a large bowl. This is where the magic begins—the seasoning brings layers of flavor and a hint of crunch that transforms simple rice into a flavorful base for your onigiri.
Step 2: Prepare Your Hands
Wet your hands generously with water to prevent sticking, then sprinkle a pinch of kosher salt on your palms. This little salty touch boosts the overall taste and gives you a tactile guide to seasoning each rice ball evenly.
Step 3: Shape Your Onigiri
Scoop about half a cup of the seasoned rice and gently press it into a triangle. Be gentle but firm, ensuring it holds together without squashing the rice grains completely. For an extra touch, press the sides against a flat surface to smooth and compact the shape.
Step 4: Wrap with Nori and Add Sesame
Take a strip of roasted nori and wrap it around the bottom of your rice triangle. If you love a bit of extra crunch and flavor, sprinkle some sesame seeds on top. This not only adds a stunning visual but also complements the taste beautifully.
Step 5: Serve or Store
Your onigiri is ready to enjoy immediately for that fresh bite, or you can wrap each piece tightly in plastic wrap to keep for later. This makes them an excellent option for packed lunches or picnics.
How to Serve Delicious Onigiri: Japanese Rice Balls You Can Customize Recipe
Garnishes
Sprinkle additional furikake or sesame seeds on your rice balls for more visual appeal and flavor complexity. Pickled ginger or a touch of wasabi on the side also pairs beautifully with the mild rice flavor.
Side Dishes
Onigiri pairs wonderfully with a light miso soup or a simple cucumber salad to refresh your palate. For something heartier, steamed veggies or tamagoyaki (Japanese omelet) round out the meal perfectly.
Creative Ways to Present
Try making bite-sized onigiri for parties or arranging them on a platter with colorful vegetable garnishes for a beautiful bento box spread. You can also get playful filling your onigiri with cooked salmon, umeboshi (pickled plum), or even spicy tuna for exciting variations.
Make Ahead and Storage
Storing Leftovers
If you have leftovers, wrap each onigiri tightly in plastic wrap to keep the moisture locked in and store them in an airtight container. They’re best eaten within 24 hours for the freshest taste.
Freezing
Onigiri freeze well when wrapped carefully. Place them in a single layer on a tray to freeze solid before transferring to a freezer bag. This way, you can enjoy your custom Japanese rice balls anytime, just pull them out and thaw.
Reheating
To reheat, unwrap your frozen onigiri and microwave for about 1–2 minutes or until warm throughout. Adding a little damp paper towel on top while reheating helps maintain the moisture and softness.
FAQs
Can I use short-grain rice instead of medium-grain rice?
Short-grain rice can work, but medium-grain is preferred due to its stickiness which helps the onigiri hold their shape better without falling apart.
What are some popular fillings for onigiri?
Common fillings include cooked salmon, pickled plum (umeboshi), tuna with mayo, and spicy cod roe. The fillings add a fun surprise to the rice balls and can easily be customized to your taste.
Is furikake essential in the recipe?
While furikake adds a wonderful umami flavor, you can skip it or replace it with other seasoning blends like sesame salt or even a mix of herbs if you want to experiment.
How do I prevent the rice from sticking to my hands when shaping onigiri?
Wet your hands with water first and sprinkle a pinch of salt on your palms before handling the rice. This simple step reduces stickiness significantly.
Can onigiri be made vegan?
Absolutely! By selecting plant-based fillings like pickled vegetables, seaweed, or seasoned tofu, you can easily make vegan-friendly onigiri that are just as delicious.
Final Thoughts
This Delicious Onigiri: Japanese Rice Balls You Can Customize Recipe brings so much joy and flavor with such a simple approach. It’s a timeless treat that welcomes your creativity and can brighten up any meal or snack time. Give this recipe a try and discover how effortlessly you can make a favorite Japanese comfort food all your own!
Print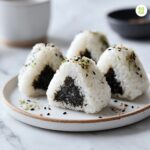
Delicious Onigiri: Japanese Rice Balls You Can Customize Recipe
- Prep Time: 10 minutes
- Cook Time: 25 minutes
- Total Time: 35 minutes
- Yield: 4 servings (4 onigiri rice balls)
- Category: Snack
- Method: No-Cook
- Cuisine: Japanese
- Diet: Gluten Free
Description
Discover the art of making delicious Onigiri, traditional Japanese rice balls that you can easily customize at home with savory furikake seasoning, crispy nori seaweed, and optional sesame seeds. Perfect as a snack or light meal, these rice balls offer a delightful combination of textures and flavors in every bite.
Ingredients
Rice and Seasoning
- 2 cups cooked medium-grain rice (preferably freshly cooked)
- 2 tablespoons furikake seasoning blend
- 1 teaspoon kosher salt
- 1 cup water (to wet hands)
Wrap and Garnish
- 4 sheets roasted nori, cut into strips
- 2 tablespoons sesame seeds (optional)
Instructions
- Prepare the Rice: In a mixing bowl, combine the freshly cooked medium-grain rice with 2 tablespoons of furikake. Mix well until the seasoning is evenly distributed throughout the rice.
- Wet Your Hands: Pour 1 cup of water into a small bowl. Wet your hands with water and sprinkle a pinch of kosher salt on them to prevent the rice from sticking and to season the rice ball exterior.
- Shape the Onigiri: Scoop about 1/2 cup of the seasoned rice into your salted, wet hands. Gently press and mold the rice into a compact triangle shape, being careful not to squeeze too hard to keep the texture light yet firm.
- Refine the Shape: Optionally, press the sides of the formed rice triangle against a flat surface to make cleaner edges and a more uniform shape.
- Wrap with Nori: Take one strip of roasted nori and wrap it around the base of the rice triangle. This adds flavor and makes the onigiri easier to hold.
- Add Sesame Seeds: If desired, sprinkle 2 tablespoons of sesame seeds over the wrapped onigiri for an extra nutty finish and visual appeal.
- Serve or Store: Enjoy your onigiri fresh for the best texture and flavor. Alternatively, wrap each rice ball tightly in plastic wrap to keep fresh for later consumption.
Notes
- Use freshly cooked medium-grain rice for the best texture and stickiness suitable for shaping.
- Furikake seasoning can be substituted or customized with your favorite Japanese seasoning blends.
- Wet and salted hands are crucial for easy shaping and adding a subtle seasoning to the surface.
- Onigiri can be filled with savory ingredients like pickled plum, tuna mayo, or grilled salmon for variation.
- Consume onigiri the same day for optimal freshness; refrigeration can harden the rice.
- Use plastic wrap when storing to maintain moisture.
- Roasted nori adds a pleasant crunch and flavor; avoid using fresh nori as it may become soggy.


